ATC's

ATC's
Artist Trading Cards I have Created

Monday, December 7, 2015

My Smash Book Updated

I've added more photos of my smash book I am making for my sister.

She came to visit not to long ago so I showed her up to this point.  

I told her it might take me 10 more years to finish it so I wanted to show her what I had done so far.

Want to see more pages

Click on the WORDs 
below to see what I have done so far.


Thanks for checking out my blog.  Please subscribe I need more subscribers.


If you like what you see please join my blog site and subscribe so you
can get updates when I add more art.

Traveling Journal Titled Inspiration

My Art Entry in another ladies Traveling Journal.

Her theme was "Inspiration"
Journal belongs to
DeNi Santana
Group we are doing this through is 
FaceBook 24/7 Circle Journal

Art below by Mickey Jo Corbin
December 2015  
My first entry in the journal.


Here is a closer pic


Each time I add to her journal I will add it on this post below these pics.  So watch for more down the road.  Thanks for reading my blog.


My Traveling Art Journal My First Entry

Wow I didn't realize how far behind I am until I just now was going to post photos from my Art Journal.  I never posted the ones from the first journal.  So guess I will start there.

Ok after my painting class I did with the Witch I went straight home and got out my newly bought Journal.  I bought it to do a Traveling Journal.  

What is a Traveling Journal you might ask?

That is where you sign up with several other crafty persons/ people.  
Each of you having your own Journal and a theme for it.  

You write up the rules you want them to follow in your Art Journal.  Such as
Theme--Mine I named The Great Out Doors

What you don't want in the journal 

such as anything gory, devilish, or spiders.  That is what I put in mine.  LOL

Your name and how you want them to do there name.

I asked they sign there name and state with month and date in bottom
 right corner of the page they did there art on.

I also asked that they do a left and right page then skip  2 or 3 pages when doing so from the last persons pages.

I asked they try to keep it as flat as possible to make the shipping a bit lower.  
For example no embellishments that stick up like buttons or flowers etc.

Ok here is what I did in steps.


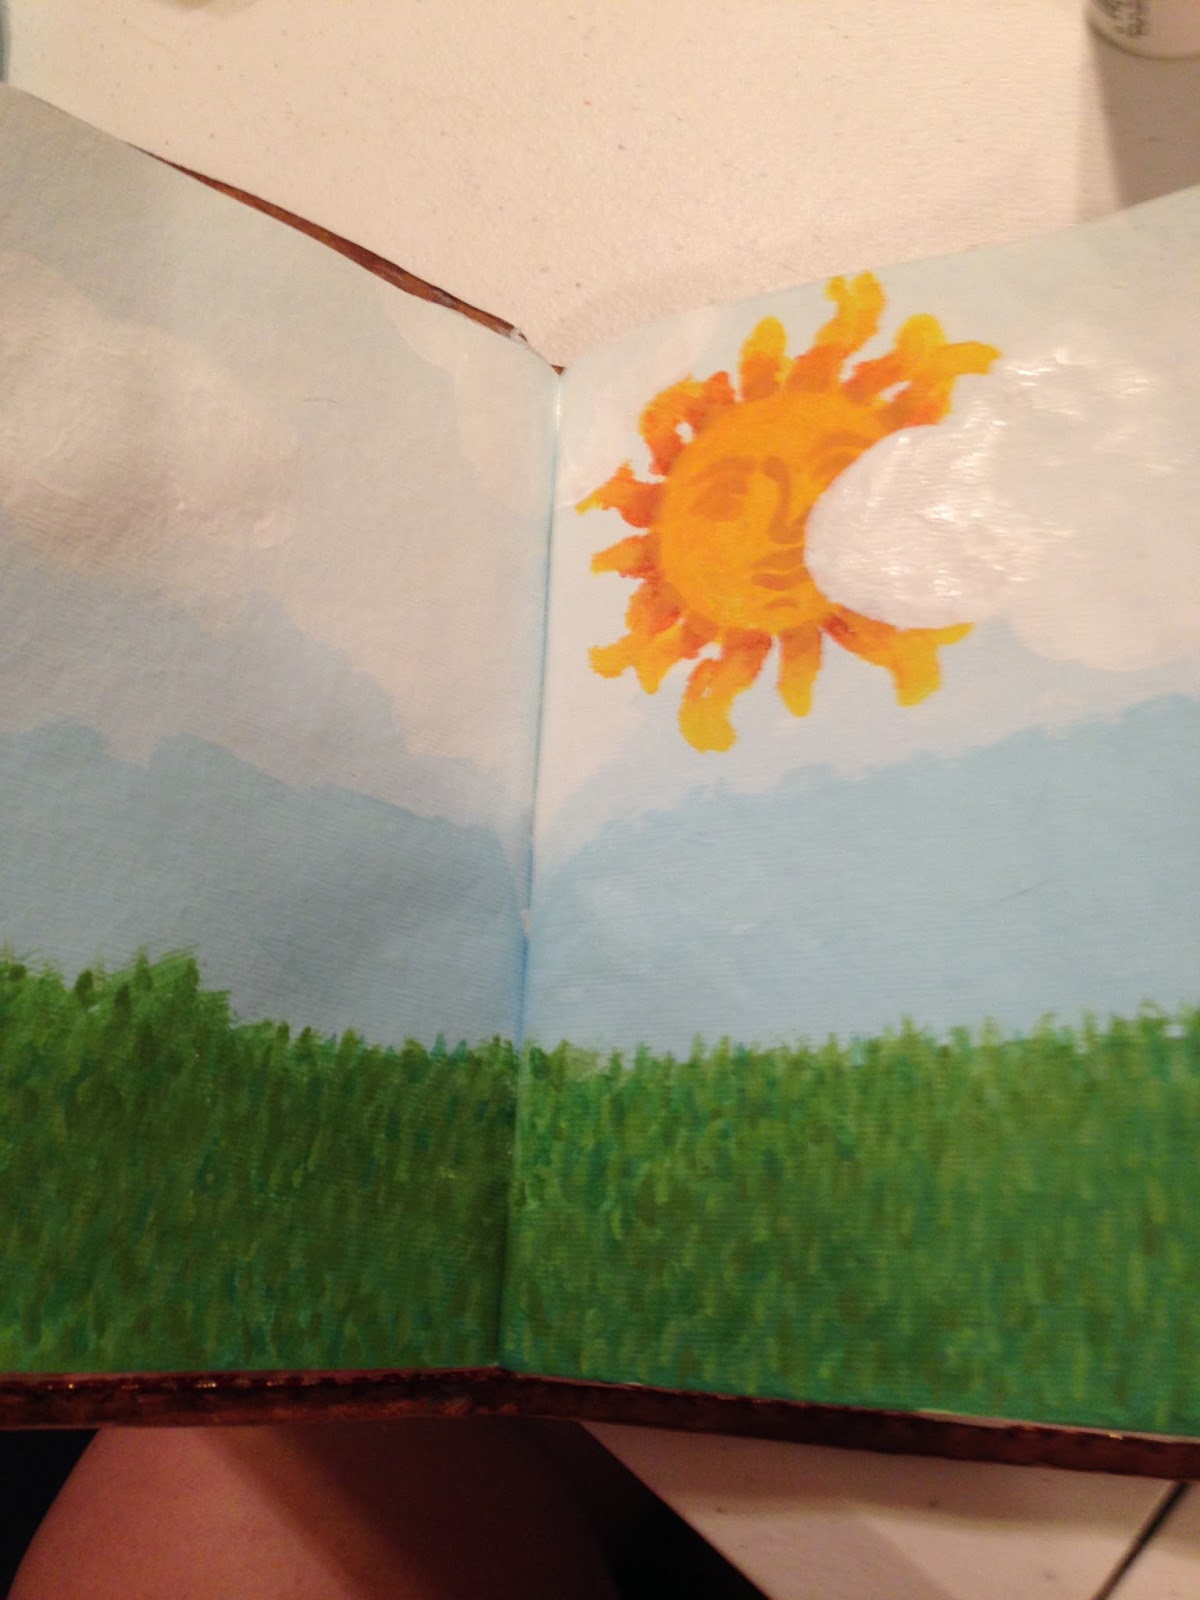
If you click on the photos you can see larger images.  I started by painting the pages in shades of blue.  Starting at the top with light blue mixed with white.  Then I used the light blue by itself. and last I used a medium blue.  after painting them I took my flat medium brush and dipped one side in my light blue mixture and one in my light blue.  I ran the brush in between where the two met to make it blend in.  Then did the same with the next line and shades.

Next I took a green that reminds me of green grass.  I painted the bottom half with that.  Then came the time taker.  grin.

After this I took I think 4 shades of green.  I took a tiny detail brush and one little swiped line at a time I put grass. All over in one color then change colors and do the same.  When all done I went back to the first color and added a few more strokes of that.


Next I used a stencil to add my sun.  I chose 4 shade I could envision in my mind of the sun.  
I used a first a medium yellowish orange.

Then using a darker Yellowish orange I added the face.

Then pull the stencil away and use a medium shade of yellowish orange on the rays.

I did this using lighter and lighter colors so that my tips were the lightest.

Then I looked up on the internet at clouds.

  
This is what I found and used to give me an idea of what cloud colors looked like.  Of course mine do NOT look like this.  LOL.  But I knew I should start with the grey to give mine the layered look.  

And last the puffy white.  dabbing it on to give it texture.


Next added a sticker I found of a house.

Then added my tree and path.  
Found out the path was suppose to be narrower close to the house.


This was my first entry in mine.  But I was so excited with it I did two more.


Hills on one page then added a tree.


This one I did a hurried version of grass and was not as please with my sky as the first one.
Then took a book and stenciled the flowers on the pages.  
Cut them out and added them to the Journal pages.
Then I stenciled some and drew some of the leaves on.  

Next I added one more flower and a cloud.


I added flowers and fairies but forgot to take photos so when I get it back I will add those.

If you like what you see please join my blog site and subscribe so you
can get updates when I add more art.


Snowman Painting with Acrylic Paint

I am so far behind on posting it is not even funny.  I'm sure all of you are getting behind on things also.  The holidays are fun by overwhelming.  LOL  I have taken a couple more painting classes since the last post and want to share them with you.  
  I'm so sorry I forgot to take pictures of the steps.  I took a few so will put them below.  

But before I do here is the steps I remember.

Paint your back ground a blue you like.  Mine is Teal and blue mixed.

Next either with Chalk or with painting draw a head and body.  You can draw it up high like I did so your had hangs over the top of the painting.  Or down lower so hat and top of hat is inside the painting.  Like they did at Painting with a Twist in Picture below.
So as you see they put there head down a bit lower.  I also didn't make my head quite as big.  I had it smaller and kept making it bigger and bigger.  But it still never got as big as theres did. lol

Next paint your hat and scarf on.   I as you can see chose to make mine look like a Yarn crochet fuzzy hat.  I mixed purple and white by taking a medium size flat brush and tipping the left side of the flat brush in white and the right side in purple.  Then dabbing it on.  NOT swiping.
My hat kind of well seemed to get bigger and bigger because it just doesn't look like theres.  But now I see there head was wider.  I like mine a lot though.  The Teacher teaching didn't teach us the blue shading on the face.  I see that now and wish I had noticed it then on the wall example.
I wasn't real thrilled with so much body and thought it needed something so I added more scarf.  The Teacher said to use white shading above the fold in the had but I took my Purple and lightened it with white.  I like it better.  Or think I do.  lol.  
I then added my mouth and snow.  And a little shading on scarf in a circle to look like it is tied in a not.  Up close i didn't' think I did such a good job.  But in this picture it looks good.  So I am proud of myself.

Now in the pic below if you look all the way to the right at the painting on the wall it has a tongue inside the mouth showing.  I was going to attempt that but changed my mind.  She did not teach the mouth.  I added that after seeing the one on the wall off to the side.

Click on Picture to enlarge it.

Hope you enjoyed this painting.  I have another that was done before this one but have to find my photos I took.  Happy Holidays to you.


If you like what you see please join my blog site and subscribe so you
can get updates when I add more art.