ATC's

ATC's
Artist Trading Cards I have Created

Friday, December 12, 2014

Yummy Veggie & Chicken Burritos-Tacos or Quesadilla's

Well i'm not sure if you call these Burritos or Tacos.  Or Quesadilla's you tell me.  But they did start off as Quesadilla's, then I got lazy one night and needed to cook up some veggies before they ruined as some were already starting to shrivel up.  So first off here is how I made those.  I took the following supplies

2 Onions


6 Carrots

6 Celery
Brocolli
3 Bell Peppers (NO GREEN)
This last time I grabbed a bag of shredded Brocolli and Red Cabbage and put it in the chopper


Now you are going to cut off all the bad or non usable parts.  You can then either slice into small slices or slivers.  The Carrots just use the shavings.  

But if you have a picky kid like mine who is now 23 and still refuses to eat any of the above. You fool them.  He begs for more now.  Cut up all of the above and then put
them in a chopper.
Mini Chopper


Chop it all up in tiny tiny tiny pieces.  Looks sort of like baby food.  

Then put it all in a skillet 

Cook shredded veggies in skillet
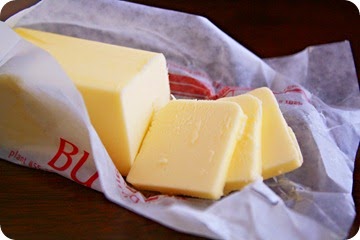
Butter

with a little butter, 


a little oil


Cook until you have a bit of it browned.  Don't burn it.

You can serve it like this or add meat.  My son eat it both ways.  I buy this


When you have it almost cooked add The meat to the Chopper and then put it in the skillet.
Then put it all into another pan so you can use your skillet for the Flour Tortilla Shells to brown them.

Brown the Flour Tortilla Shells

Your suppose to put them in a dry skillet, but I put button on with a butter knife and scrapped it back off so that it was very very light.
Flour Tortilla Shells

Just before serving add a a bag of shredded cheese to the skillet and mix it up real good

or you can add over each one once it is on the shell


Now add 2 spoon fulls to each one 


Then roll it up and take a bite


Veggie Burrito

Now this of course is a Burrito, but I learned how to do all this to make a Quesadilla's and then when I made them this time I just didn't feel like heating up the broiler ( I don't use a skillet because I spill it all out when I flip it)

Ok go make one.  You can put any veggies in it that you want to.
 

Friday, December 5, 2014

My Handmade Christmas Cards

Hello everyone,
    Well it is the 5th of December and i just noticed I haven't posted in a while now.  So sorry about that.  So I thought I would come on and show you some cards I have made for Christmas.  Hope you like them.


Snowy little card.  I see I never colored in my little bird on my snowmans arm.  LOL
 I have two different versions of this one so here is the other one
This next one I am calling a Poinsettia but really don't know what type of flower you would call it.  I had fun making this one.  Not sure if you can see but the edges are all embossed also.


I have a few more cards I have made for christmas back in October.  Not sure if I have already shared them with you or not. But I will go ahead and share them now just in case.

and another version of this


if you enjoy seeing cards that I make please subscribe or follow me.  I also can be found on instagram under the user name mouseyjo

Sunday, November 2, 2014

Halloween Potion Bottle DIY

Ok I was in Hobby Lobby last week and was looking for some bottles to make it look like Potions from a mad scientist Lab.  I came across the bottle below and about died when I flipped it over and seen the price.  No way was I spending that much money.  I think it was like $21.  Not sure I'm terrible at remembering prices sometimes.  grin.


After looking it over I though to myself I can make one of these.  So first I found the bottle.  Now this is the weird thing.  Same isle clear bottle.  But over near the restrooms another isle of glass CLEAR jars.  Same jar but about $4 less.  So this is the one I got.

Then I needed something to color the jar so I bought some Krylon Webbing Spray in Gold for $5.99 (lol price is still on it)


I needed the top and knew i had seen something like them in the isle with all the cupboard knobs.  So I bought these and took the screws out.


I found some Labels about a month ago.  Not sure where I got them.  But you probably can get them at Hobby Lobby in sticker isle or find some printables on line.


I went a little crazy with the Gold Webbing.  Even got it all over my porch.  Didn't know that is shot out webs Duh.  lol  I also picked up a few liquor bottles from friends.


Skull from Walmart and Jar from Hobby Lobby sprayed inside with Gold Webbing


Have to have herbs for potions


Other Liquor Bottles.  Kind of got one label on crooked.  grin


Eyes from Dollar General and Jar from Hobby Lobby.  I need to find a cork to fit in the top.  So far each one I try are to big.  


I have been buying little jars everywhere I can find them.  

Ok back to my Jar I worked on.  Next I put the label on it.


Looking good so far.  I knew I had some Jute (string) in my craft room to wrap around the top.  To keep from having to scroll back up I"m posting the Jar again I am trying to copy.


This is what it looks like (pic is upside down but think you can figure out what it looks like.  I think I bought mine at Walmart back in the paint section.


Take your twine and Tie it around your bottle 


Then start wrapping it around.....Keep wrapping until the entire area is covered


Ok come back as I finish this project.
 Even though Halloween is over I am still working on things for next year.

Tuesday, October 28, 2014

Recycling Handle for my Rubber Made Case

Hello everyone.  Well I did something kind of neat the other night and wanted to share it with all of you.

Not sure how many of you know what a Wall Paper book is.  But let me explain.  When Wall Paper stores have designs for customers to choose from they come in a HUGE book.  Like 20 x 20 inches.  When they get new designs they expire the old ones.  Now if you live anywhere besides Tennesee (grin) you most likely can go to a Wall Paper store like Sherwin Williams and they will let you have a few of these.  You have to go often and keep asking and get them to put your name on a list. A lot of Teachers get them for Craft Projects.  Some places Like Tennessee Charge you for them.  When we were in Georgia Hubby went to get me a couple and came home with 16 of them.  That was about 10 years ago and I still have some left.  grin  I love them.

Here is a Wall Paper Book

I already started working on it when I decided to take pics and show you all what I was doing.  I had used pretty much all the paper up and just hate throwing things out.

So I decided to put the rest of it to good use.


Next I took a xacto knife and cut down the spine so you can get to the handle metal parts.


Below you can see the metal parts where I bent them OUT so I can pull off the handle.


Below is my lid Before I did anything to it.


Next I layed the handle on top of my lid and using a Black Permanent Marker I drew lines where the metal brad like pieces needed to go.


Next I got our Ice Pick and lit a candle to heat the tip of it.


I used the Pick to slowly melt through my lid in the places that I marked with the permanent marker.


It doesn't stay hot for long.  So you have to keep going back into the candle flame to get it hot again.  And once you have melted some with it the gooey melted plastic starts sticking to the pick and once reheated it turns black.  So you have to keep wiping it onto a piece of paper then heating and repeating until tip is sort of clean again.

Once I got my hole started I had to start making a slit for the width of the metal piece on the handle.

I kept doing this until my handle would fit into the 4 slits.


Once everything fit good I had to get some pliers to bend these down with.  I didn't get them flat as they were way to thick and took a lot to get them to bend down.  And you have to be careful so you don't crack your plastic lid.

They need to be bent as far down as you can get them.  But not all they way because it is not like they are going to slid back out.


Don't that look great.  Now you can't put to much weight inside the container because I'm not sure how much weight the lid can handle pulling in the middle.


I LOVE it now.  Before when I would take my Leather Charm Bracelets to show them off I had a hard time carrying my purse this container and maybe a drink or anything else.  Many a times I would slip and it would go side ways and all my jewelry would slide down to one it all jumbled up.  And of course it took TWO HANDS to carry it if I wanted it to stay level.

Now I only need one hand.


So next time you see a handle on something that is broke think what you might be able to recycle it to.  This has really saved me a lot of anger. lol