ATC's

ATC's
Artist Trading Cards I have Created
Showing posts with label Handmade Journal. Show all posts

Wednesday, July 27, 2022

Dangles

 Dangles 

What are They you ask?

Well they are pretty little 

baubles/creations attached with a

Lobster claw or a Swivel Hook.

Or just a plain hook you find on just about anything.
for Journals, Bibles, Purses,
 your Rear View Mirror and more
Making it easy to attach to anything you want them too. 
 If they are strong enough you can even attach them to your lamp.

I enjoy making and selling them.
If you would like to see more of my creations 
click on the link below
 or skip on over to Etsy.com and look me up under CardsCraftsnMore

Thanks for Checking out my blog.

Please Subscribe to me    aka    FOLLOW ME. 
 Just click on the little button to the left of this that says Follow Me.  

If you subscribe to my blog site you will then get updates when I add more art or another post.

Comments are Welcome.


Wednesday, July 12, 2017

Journaling and Bible Versus

Hello again everyone.  I am a bit behind on posting.  I wanted to ask you all for a huge favor.

Here is the SMASH book I am making for my sister.

I would like to put a bible verse on the page with the tree and the one with the deer.  Two different verses.  I just am lost.  Would love to see some recommendations.  

Here is the link directly to the SMASH book posting.


I'm way behind on working on her book.

Kind of lost the incentive. 
Maybe some help will prompt me on again.  


Thanks for Checking out my BLOG.

Please Subscribe to me aka Follow me.
Just click on the little button to the left of this that says
FOLLOW ME

If you subscribe to my blog site you will then get updates of
when I add more art or another post.


Comment Below
And let me know if you have ever made a Smash Book Before.
Leave your link so I can check it out.  Would love to see what others are doing.


Saturday, April 23, 2016

Peace Wreck this Journal Amber

Wow I can't believe I didn't share with you all the 2 Journals / Books I made.
Haven't put anything inside of them yet.   

The first one was made for my sons Girlfriend.  She had so much fun with a store bought
journal called Wreck This Journal that I wanted to make her one.

She loves anything colorful.  So I let her choose the Scrapbook paper to cover the book with. And is MAJORLY into Zebra print.  So she wanted to put some on the binding.

Now let me show you the back first.  I layed the pretty paper down making sure the Peach signs were facing the right way.


Ok now don't laugh, but I layed out the paper just right again for the front of the book.  BUT didn't realize when you put the book into readable position, the peace signs were now 
upside down.


Ok it is kind of funny.  I couldn't wait for Ambers book to be finished.  
I did so much work sewing my pages together
and then getting her binding right.  Guess next time I need to pay
better attention.  

Here is some of the things I wrote down for her to do on the inside

1- using different kinds of lipsticks kiss all over one of the pages.

2- Write down each of your families members names one at a time.  Then beside the name or under or above the name draw a drawing of what comes to mind when you think of this person.

3- Draw 2 columns.   Title one color boys names and one girls names.  Then write under neath them names that you might name your children if you had 12 kids.

4- Using magazines, sales ads, junk mail.......... cover one page with words starting with the letter
    "W"

5- Write down 50 things you love.

6- Using your LEFT hand draw a picture of your boyfriend/ husband/ brother/ best friend.

7- Using Card Stock or sturdy paper.  Take a butter lid that is round.  Draw a circle in middle of the paper.  Take scraps of paper from anything..... construction paper, magazines, junk mail etc. cover the other side just in the middle where circle is.  Hold up to the light so you don't cover more than you need to. (going to far outside the circle lines.  When dry, cut out the circle glue it on a page and name your art.  Don't forget to sign and date it.

8- Using magazines cut out pictures of things you like and make a collage on a 2 page layout.

9- write a short poem on one page.

10 - Write a song about a dog.

11- Draw a picture or cut out one from a magazine and write a short funny poem or story that you might find in a childrens book.

12- What are your favorite foods and drinks...... Find pictures to glue beside each one.

13- Title page with Todays Date, Month and Year.  City and State you live in.
     Then put the following to look back over years from now.  Cost of each item.
Gas Price------------------Slushy-------------Shake-------------French Fries------------Whopper--------Milk------------Bread-----------Lays Potatoe Chips-------------2 Lt Bottle Soda------------
Monthly Phone Bill-----------Happy Meal------------- Movie Theater Ticket------------- Call a high school find out what the cost of a Year book is..............And Prom tickets.


What do you think.  Do you have an idea for what she should do on a page
in Ambers Wreck this Journal.  We would love to hear from you.


If you like what you see please join my blog site subscribe so 
you can get updates when I add more art or posts.


Monday, December 7, 2015

My Traveling Art Journal My First Entry

Wow I didn't realize how far behind I am until I just now was going to post photos from my Art Journal.  I never posted the ones from the first journal.  So guess I will start there.

Ok after my painting class I did with the Witch I went straight home and got out my newly bought Journal.  I bought it to do a Traveling Journal.  

What is a Traveling Journal you might ask?

That is where you sign up with several other crafty persons/ people.  
Each of you having your own Journal and a theme for it.  

You write up the rules you want them to follow in your Art Journal.  Such as
Theme--Mine I named The Great Out Doors

What you don't want in the journal 

such as anything gory, devilish, or spiders.  That is what I put in mine.  LOL

Your name and how you want them to do there name.

I asked they sign there name and state with month and date in bottom
 right corner of the page they did there art on.

I also asked that they do a left and right page then skip  2 or 3 pages when doing so from the last persons pages.

I asked they try to keep it as flat as possible to make the shipping a bit lower.  
For example no embellishments that stick up like buttons or flowers etc.

Ok here is what I did in steps.


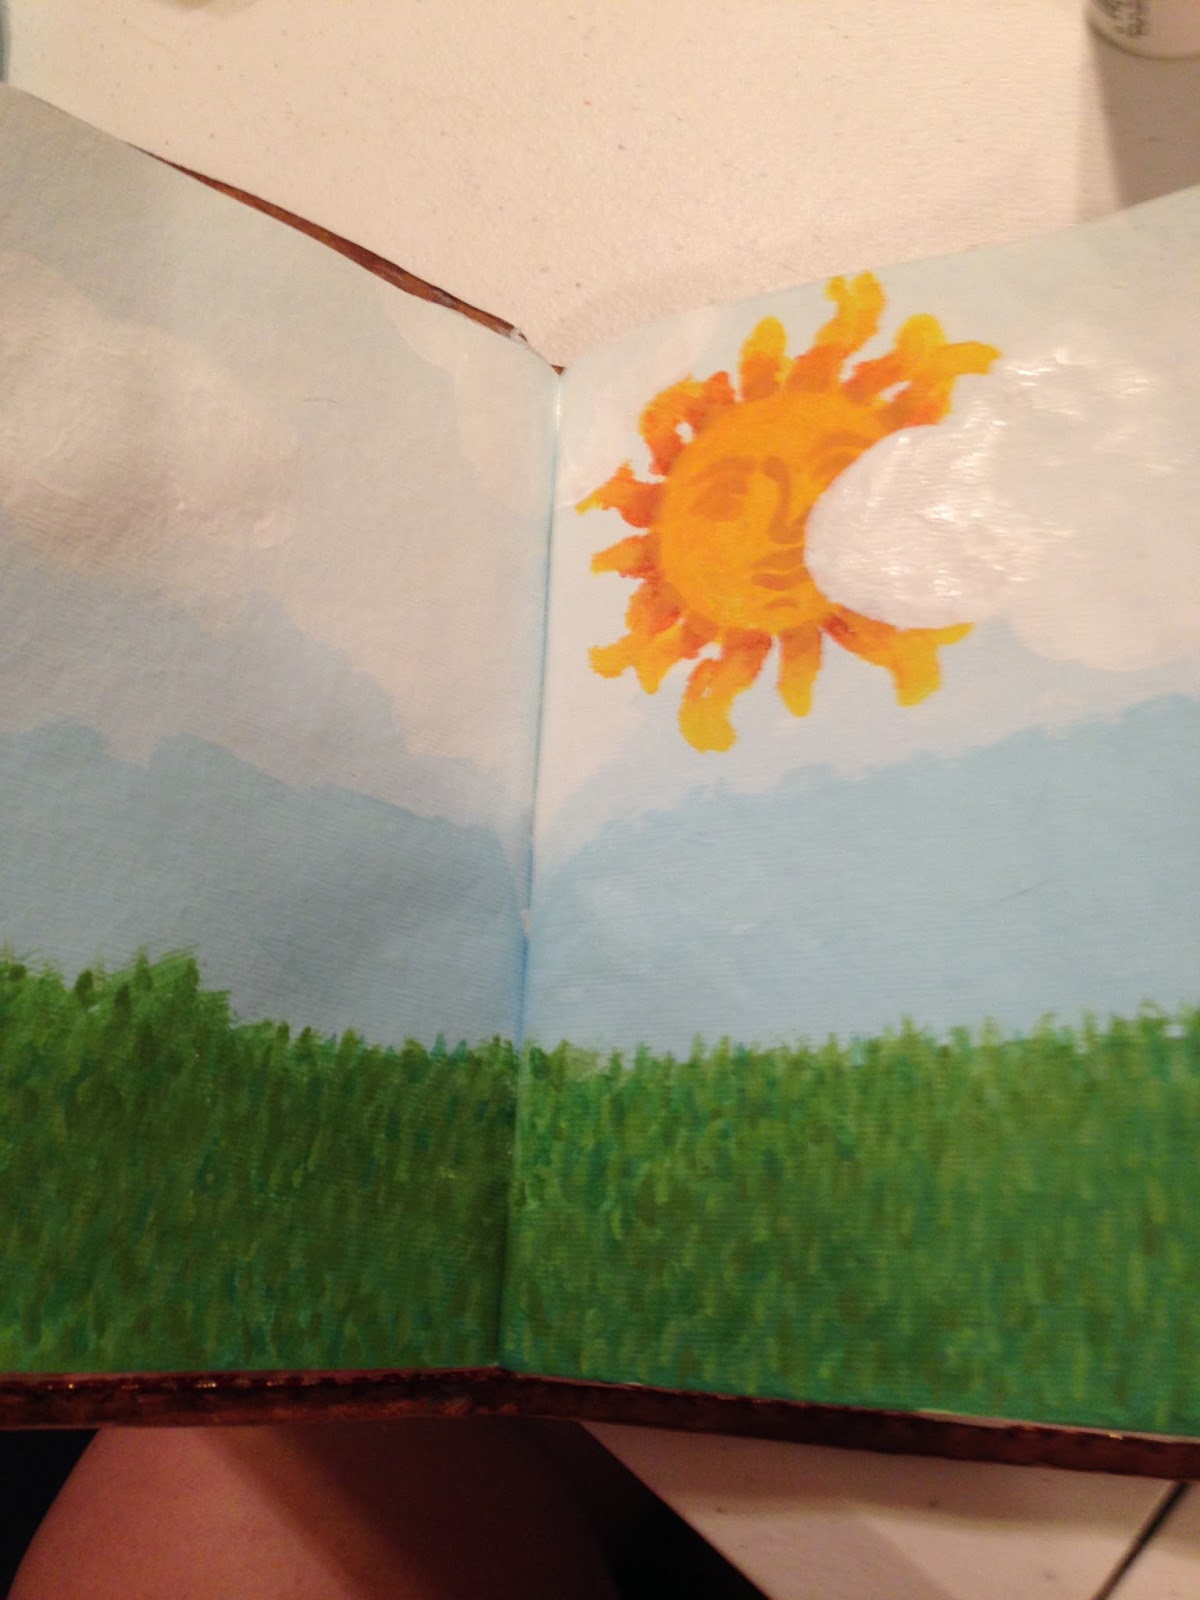
If you click on the photos you can see larger images.  I started by painting the pages in shades of blue.  Starting at the top with light blue mixed with white.  Then I used the light blue by itself. and last I used a medium blue.  after painting them I took my flat medium brush and dipped one side in my light blue mixture and one in my light blue.  I ran the brush in between where the two met to make it blend in.  Then did the same with the next line and shades.

Next I took a green that reminds me of green grass.  I painted the bottom half with that.  Then came the time taker.  grin.

After this I took I think 4 shades of green.  I took a tiny detail brush and one little swiped line at a time I put grass. All over in one color then change colors and do the same.  When all done I went back to the first color and added a few more strokes of that.


Next I used a stencil to add my sun.  I chose 4 shade I could envision in my mind of the sun.  
I used a first a medium yellowish orange.

Then using a darker Yellowish orange I added the face.

Then pull the stencil away and use a medium shade of yellowish orange on the rays.

I did this using lighter and lighter colors so that my tips were the lightest.

Then I looked up on the internet at clouds.

  
This is what I found and used to give me an idea of what cloud colors looked like.  Of course mine do NOT look like this.  LOL.  But I knew I should start with the grey to give mine the layered look.  

And last the puffy white.  dabbing it on to give it texture.


Next added a sticker I found of a house.

Then added my tree and path.  
Found out the path was suppose to be narrower close to the house.


This was my first entry in mine.  But I was so excited with it I did two more.


Hills on one page then added a tree.


This one I did a hurried version of grass and was not as please with my sky as the first one.
Then took a book and stenciled the flowers on the pages.  
Cut them out and added them to the Journal pages.
Then I stenciled some and drew some of the leaves on.  

Next I added one more flower and a cloud.


I added flowers and fairies but forgot to take photos so when I get it back I will add those.

If you like what you see please join my blog site and subscribe so you
can get updates when I add more art.


Wednesday, June 4, 2014

Book Binding

Well I see I never did anything with this page.  So sorry, guess I got lost somewhere in la la land and never finished.  ORRRR it might have been when I couldn't get into my blog no matter what I tried.  Sooo now I am in and want to share this link. 

This is from one of my many board on Pinterest.  I'm just starting it to build this board with Book Making. Links are below each picture.              The next link below this has even more.


Just click above and go to my link.  If it don't take you there well I'm sorry but you will have to do it the slowwwwww way.  Looking me up on Pinterest.

Mickey Corbin


Check out my many boards.  I've heard I have some awesome pins.  


One of the stitches I have learned to do that is really neat and fun is the Coptic Stitch.  Click words below pic for Tutorial.


Click to check out these YouTube Tutorials.  Sorry Pics are blurry I just saved images.


Coptic Stitch binding demo part 1


Coptic Stitch binding demo part 2


This Pinterest board has some awesome examples of the Coptic Stitch


Lora Kinberger Coptic Stitch Pinterest Board


How about some other stitches. 
Book binding Tutorial for Long Stitch Binding
I can't wait to try this.  These are just pictures then the Tutorial


Ok found a great link for the Book above.

Donna Meyers Daily Journal Challenge to make a book a day.  Day 365


For a great book to purchase to teach you some of the techniques


Well hope some of these links teach you something new.